|
Here's a few old pictures of my 2nd ROV. These were taken about 3 years ago when the machine was still new. It's spent a lot of time in the water and is showing it's age.
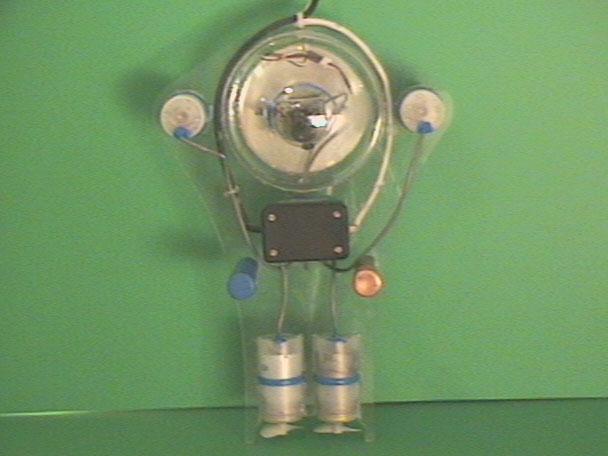
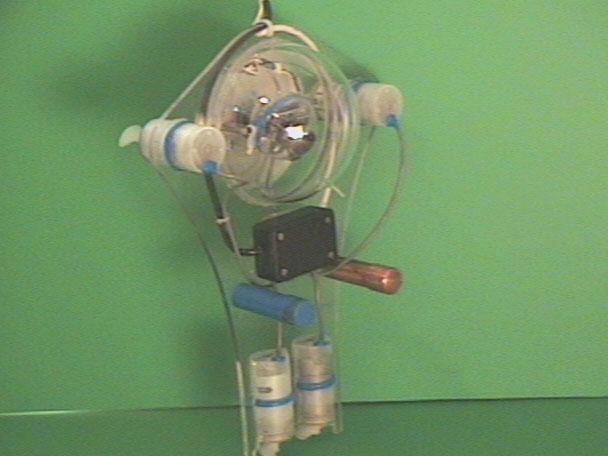
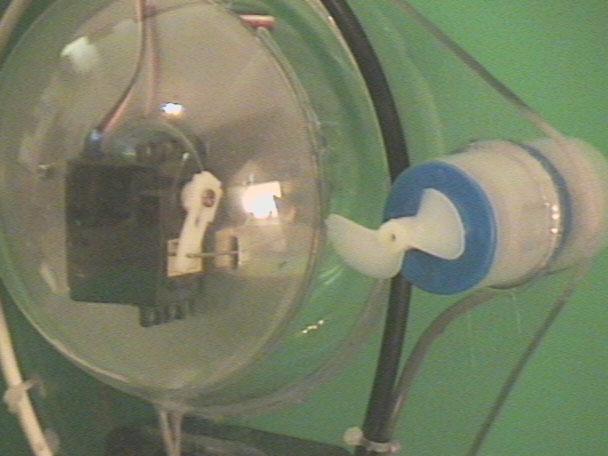
Pictures 1 and 2 show the ROV. It stands upright at about 15" tall and 11" wide. It goes into the water standing up and is weighted for negative buoyancy. It sinks to the bottom and the camera sits about 12" from the bottom. The advantage of this system is that it can sit on the bottom not using power while you look around. When you want to see something different you lift off the bottom using the vertical thrusters, move to a new location and let it settle back to the bottom. It's quite stable since all the flotation is at the top and all the weight is under it.
The large plastic sphere is 6" in diameter. The 2 motors on either side of the ball move the machine forward, back and turn it. The 2 motors at the bottom lift it off the bottom to turn or move. The Black box under the ball is a junction box so that I don't need to run the motor wires into the pressure housing. The tubes under the junction box are the weights. I've got separate weights for fresh and salt water. The weights are copper tubing filled with lead. For some reason the rubber coating doesn't bond well to the surface and I ended up leaving most of the weights uncoated.
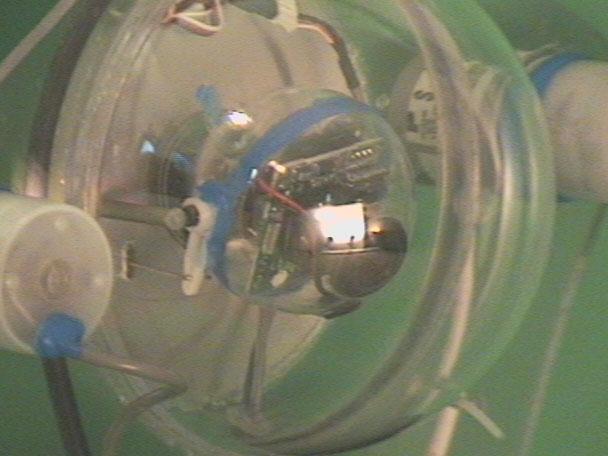
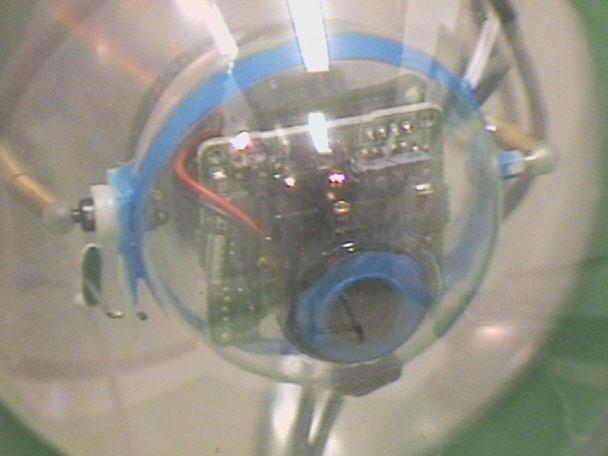
Pictures 3 and 4 shows a close-up of the camera. It's a low light B&W ccd camera.
In addition to the main pressure hull I've enclosed the camera in it's own waterproof housing. This is a safety feature in case the main hull leaks. On each side of the camera ball you can see the pivots that allow the camera to tilt up and down. The linkage going through the mounting disk connects to the camera tilt servo. The camera tilt servo lets you look around without having to run the thruster motors.
Picture 5 shows the rear view of the camera mounting disk. The servo is attached to the mounting disk with hot glue. The blue trim is a paint on rubber coating to aid in waterproofing.
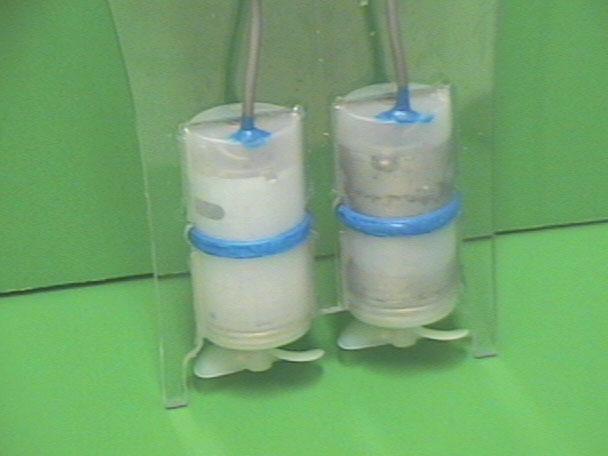
Picture 6 shows a close-up of the vertical thrusters. The discoloration of the one on the right is caused by a leak allowing saltwater to enter the motor.
The motors are 540 sized hobby motors and the casings are a soft plastic container similar to a film container that just happens to fit the motors nice and snug.
On this version of the motor the shaft seals were just an O-ring glued to the casing. It works for a while but will eventually leak. I've since switched to a multi stage seal that's far more effective and durable.
The frame is 1/4" lexan and everything is attached with hot glue. Aside from the stainless motor shafts the only exposed metal on the ROV is the weights. This allows it to be used mostly in salt water with no ill effects.
All of the components are pressure tested to 250' but the tether is only 100' so that's my depth limitation.
Although it worked well for a prototype it's main problem is drag when it's moving forward. The forward thrusters are mounted too high and the drag of the frame running side to side causes it to lean forward a lot when it moves.
There are no pictures of the monitor or control box. It's a pretty crude looking system. I use a 5" B&W TV and a pair of car batteries to run the entire system. The tether consists of a separate cables for video and control. This was to save cost and reduce electrical noise from the motors in the video cable.
Currently I'm working on another ROV of a similar design. Once I get finished building that I'll be stripping this one for parts and trying a completely different design.
|